Sunday, May 1, 2011


Lining ceiling Gib for large area require back block to hold joints together. Fixing spacing at every 300mm at primeter and one at centre of Gib board on the ceiling batten. Gib adhesives is glue on ceiling batten avoiding any fixing points

Joint of two board is to hold with timber batten with nails between to puch joint up and creat a curve in for plastering

Polyster fiber insulation with R3.2 value use for ceiling and R2.2 for wall

Cutting by knife or saw, insulation should be cut and fit firm inside of wall space and not protude or having large gap allow air to flow through

Any small gaps should all be fill between the framing


Scriber is to be cut with protude out of joinery 3mm or more evenly. finish cut of 45 degree angle on bottom

 Soffit moulding joint with 45 degree cut and rebate side showing. moulding should be push tight against the soffit and wall cladding as mush as possible

Monday, April 25, 2011


Fixing weatherboard to the gable end is to use a ply sheet and cut an angel sample on each of the gable side and use it to scribe to end of the weatherboard for cutting


Use another off cut of weatherboard to mark out how much to cut on external corner of the wall. Drill the nail holes once the weatherboard is level and nail with aluminium rose head nail at bottom of the board to all batten, nailing pattern should be minimum 40mm from edge of the board and space no more than 600mm and vertically in line.

External corner will have tolerance for an open joint as it will be cove by corner soaker later. Internal corner will need to be notched with no gap shown.

Weatherboard will need to be fitted 10mm into the bottom and side of window & door joinery, head flashing may need to be scribed and cover by weather board above with 5m gap allowing water to flow out

Fix weatherboard by its full length and do not joint over opening, do not joint too close to another joint, line all nail fixing vertically and horizontally with pre-drill holes, no damage should be made to the face of weatherboard, cut all joints and corner with 45˚ cuts and prime all cut

Start from the bottom of the building and work your way up the wall. Set the first weather on the very bottom mark set with the story rod and temporary nail the top of the board on batten, level the top edge of the weatherboard and make sure there is 15mm cover over the vent strip


Fixing weatherboard, start by set 5mm gap from head flashing and dumpy level to all side of the walls, use string line or piece of weatherboard and set to that 5mm mark and check for level. Set out story rod for the house with spacing of weather board (in our case 162mm) and transfer the marking from the 5mm mark above head flashing all the way down. We can then chalk line every 162mm mark when fixing weatherboard

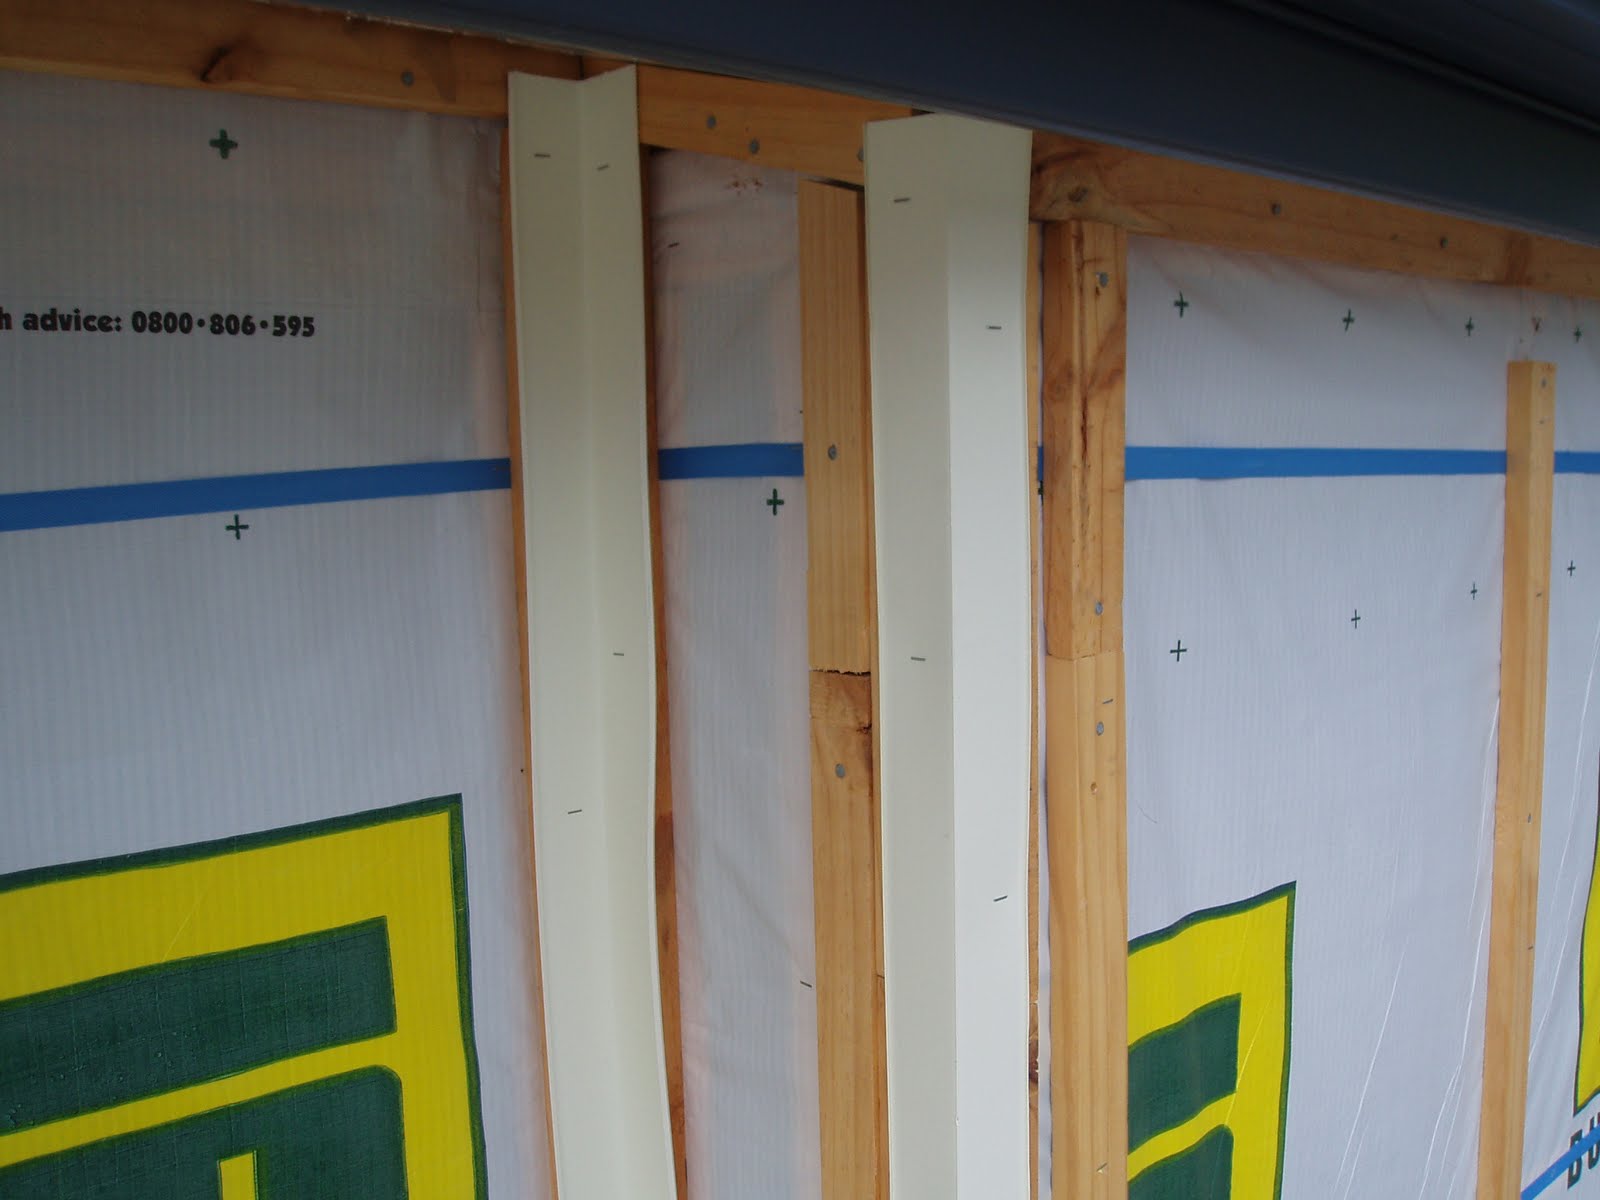
All battens are to be check with spacing no more than 600mm,and runs continuous from top to bottom, if the batten toward the joist and bearer is not level, it may be require be packing out or planning down. Head flashing will need to be installed to all joineries using flexible flashing tape (Aluband) to tape it against the top of joinery and building warp, then lapping vent strip over the head flashing and tape against the building wrap as well. Both side of the head flashing will be fitted with stopper with sealant.

Sunday, April 24, 2011


Fix nogs between framing to create a space for power box to fix to. Creat moisture resistant opening as window and seal with flashing on top and side of the power box. Alue Band tap head flashing and vent strap on top of the power box and fix extra cavity batten around for weatherboard.


To adjust exterior door and window, measure equal and same distant from top plate to top of the exterior joineries, level horziontal on top and minimum 10mm protude out the framing at inside of the house for Gib then tag window.

pack bottom/top and two side for level and straighten joinery frame center as possible and then nail off with jog head nail and punch in.


cavity batten of 20mm thick and 40-60mm wide fixed max of 600mm spacing on to the exterior of timber framing over the building wrap. Horizontal batten on top of the wall framing should be continuous with no gaps, vertical batten to all interior/exterior corners and both side of the window/door should be thin down for difference of lashing and easier to slide cladding behind the joineries. horizontal battens under window and doors should be fixed in a 5 degree angle with minimum of 50mm gape to the vertical batten allow water to run out.
Vent strip is to be fix alone the bottom of the batten about the height of the bearer, batten is to be taken a bit off in order to slid into the vent strip. 50mm PVC corner flashing are to be fixed to all internal and external corners running continuously or over lapping top to bottom, use same flashing for both internal and external as the lip folds both ways
At window and door opening, cut warp and fold into the house, use window sealant tape (Alue Band) to tape continuous on the bottom of opening with a up fold of 200mm on the end, 200mm taping on each of the top corner and taping over the cuts again on all corners


Building wrap is to be wrap around the building from bearer upward in full length of the wrap, wrapping top over the bottom sheet if more covering is required, minimum 150mm is required for all lapping

Blue ribbon tape is then fix around the house in between the space of the nogs stopping building wrap blow against the exterior cladding.


After roof cladding, gutter and fascia. Builder can fit soffit
board onto the eve of the roof


Boxed soffit was form when building timber roof framing. Soffit board is then cut in size and slide in between the fascia and nail onto the boxing. Nail hole must be pre-drill and nail with a special plastic made plug for fixing and looks. Joints of the soffit board will be fitted with a plastic strip covering the joints and moulding will be use to cover the cut joints between the wall cladding and the soffit.

Wednesday, December 8, 2010

 Nog can then be fixed for soffit fixing, all eves require nogs fixed between trusses on it flat or edge depend on the position of the house as long as it will not be in the way of fixing fascia board. Fix nog around face of the trusses vertically for fixing of weatherboard


C nail can also be connected on top plate and studs/jack stud with routing then nail flash against the walls
 Roof plan bracing will need to be fixed before nailing all purlin off, steel brace strap running 45 degree at end of roof plan under purlin is to be tension and nailed on tuess and top plate.

Wire dogs/Z nail is to connect purlin and truss together, bottom two and top two purlins are to be fix with 2 wire dog one each side of truss, all other area are to be fix with one in stagger pattern. There also require a wire dog at every cut end of purlin to enforce the hold down
70 x45mm purlin is to be fixed at 500mm spacing for the bottom two from eve and top two from ridge, the rest will be spaced equally. Nail off purlin when all roof trusses are level and equally spaced. Purline is to be cut and joint on truss and stagger pattern, 2 nails on all purlin to truss and 4 nails at joints of 2purlins
Truss setting on top plate can also be fixed off with two CT 200 Ceiling Tie on each side of the truss, all holes are to be nail for the strength of the tie
Dragon Tie can be installed before purlin are fixed, a piece of 100 x 50mm timber fixed 45 degree on top plate to top plate at external walls and no more than 2.5m away from the corner
 Two sloping verge of the house can be constructed either by outrigger & fly rafter or pre-nailed boxing. Outrigger is to overhang on verge of truss by 405mm and fix with fly rafter of 45mm at the end, a piece of diagonal outrigger is set approximate 45 degree setting on top of end truss and fixed onto fly rafter and outrigger. With boxing verge, it is to be constructed with nog and fly rafter on ground, then fixed onto the end truss. Attention require on straightening on face of fly rafter and bottom edge as for the flasher going to be fixed on